Sunday, May 24, 2009

Bailey's Face Cups

nblab_collectI've been collecting the Bailey's Irish Creme Cups since they were first introduced sometime in the 90s. Well, I only had 4 (before yesterday, but I consider them a little collection because I love them and display them and am always looking for more at a good price. I got the Helen Hunt Limited Edition Cups with a bottle of Bailey's back in the 90s, then found a set of the man and lady cups at a thrift store a while back. I don't know how many cups were released in all, but I will find out and I will have them ALL some day ;)

nblab_funfindsYesterday, while fluffing up my Antique Mall Booth, I found another set to add to my little collection...a Sugar & Creamer set! So cute and only $5 for the set!  They match the man and lady cups I already have and now my collection has 6...

baileyssugarcreamer

Vintage Ever-Ready Razor

nblab_funfinds I am starting to understand the Vintage Razor Obsession...ha!ha! There are so many awesome old razors out there and the Shaving Community is so helpful and interesting. So, I went to add some things to my Antique Mall Booth yesterday, and the lady across the way had a lovely old flip-top Ever-Ready Razor (PAT'D 1912) just sitting there waiting for me. It was marked down with an additional 25% off, so I got a new specimen for my little collection for about $5!

everready

This razor uses single-edge blades, which I haven't had a reason to purchase...until now. As soon as I can get some, I'll give this one a try.

nblab_collect Now, what to do with this little collection that will probably grow? I had a small cabinet out in the garage awaiting it's turn to be painted black, but I decided it would work nicely in the bathroom, as is, to house the razor stuff collection.

shavecabinet

Great, just what I need...another hobby ;)

Saturday, May 23, 2009

Vintage Reproduction Safety Razor & Real Vintage Safety Razors...

nblab_ramble Last Christmas, I gave Mr. NeverBored a Safety Razor set up (vintage reproduction safety razor, shaving mug, badger hair brush, mug soap, a gazillion razor blades, and a book to help him learn how to use all that stuff). I must admit that my main motivation when I started looking at razor sets was the fact that Mr. NeverBored's razor cartridges were costing us a pretty penny each month...especially since he liked to have a new cartridge with almost every shave. Add that cost to the cost for my shaving cartridges (I could go at least a couple weeks with one) and $$ just kept adding up. So, I searched around on the Internet and decided that a Vintage Reproduction Safety Razor was the way to go! Not only would it look nice in the bathroom, we were going to save $$ on blades AND take a step in the greener direction of reducing waste (those cartridges and disposable razors create a lot!) So, I took the plunge, bought the set and presented it to him on Christmas morning. He was quite intrigued and that afternoon we retreated to the bathroom, book in hand, and had our first lesson. It resulted in the smoothest shave he's ever had and he was hooked ;)

Here is the book I purchased...

Leisureguy's Guide to Gourmet Shaving: Shaving Made Enjoyable

It was very informative and gave us all the info we needed to get started with Wet Shaving.

Here are items similar to what I purchased:


Badger Shaving Brush:

Colonel Conk Shaving Mug & Soap:

There are also fancy Shaving Kits that include everything:

But, you really don't need to spend that much to get started. You can actually get started for very minimal cost....AND! I'm pleased to report that Mr. NeverBored has not asked me to buy new razor blades yet! The starter pack that came with his set has lasted all these months AND there are still some left...even enough for me to snatch a pack and get started on my own Wet Shaving Adventure ;) ...

nblab_funfinds Ever since Christmas I have wanted my own safety razor set, but haven't had the extra $$ to buy all the stuff just yet. Then, the other day, I was at one of my favorite thrift stores and happened to find THREE vintage Gillette Safety Razors for only $2 each! They were a bit dingy and grungy, but I figured I could clean them up.

razors1

I did a little research on the Internet and here is what I came up with for VINTAGE SAFETY RAZOR CLEANING (check back a little later for the link to my tutorial) ...

Friday, May 22, 2009

From here to there

Too much time, too little to do...uh, strike that...reverse it...too much to do, too little time. I have been thinking about moving one of my web sites for a while now, but knew it could turn into a time sucking drain on me...so I put it off. Then, it was time to renew the domain name and I discovered that by moving the web site to the company that held the domain name, I could save about $400 this year. I contacted my current web host to try and negotiate some kind of reduction in monthly hosting fees (mainly so that I wouldn't have to actually do the huge moving project). No luck. I've been with them for almost 10 years and they wouldn't offer me anything to stay. Wow. So, they've lost a good customer and I'm going to save a bundle. Let's hope the new host works out [fingers crossed].

Long story short, that's what I've been doing this week. Moving a web site and dealing with all the hassles that go with that. I'm getting grumpy because I haven't gotten to make anything fun this week :( ...  well, that's not completely true...I did find time to make a cute little display case for my Antique Mall Booth and managed to clean up some awesome vintage safety razors found for a steal at a thrift store. I took photos and will put together a quick tutorial as soon as I can.

Back to the Interweb!

Saturday, May 16, 2009

Couldn't Leave It Alone...

nblab_contproject So, of course, I couldn't leave it well enough alone. I just kept looking at that black hem and not liking it and not being able to move on to another project because this one was bugging me. I thought about adding some lace or a black ribbon and a bow, but neither of those stretch and might require additional care after washing (i.e. ironing...something I really don't care for). Then I found it! A whole roll of black organza elastic lace! It's pretty and frilly and fun and stretchy...perfect! I pinned the lace over that ugly black hem, zig-zagged it on and done! I think it looks so much better now...and so does she ;)

Tafterafter

It might still need a bow somewhere on the hem and some stripey sleeves...maybe I should change this blog to "Never Done!"

Lengthen a kid's Tshirt ( tutorial )...

nblab_newprojectThing 2 has a birthday sleepover party tonight. She got up and dressed herself in a favorite T-shirt that is getting shorter every time she puts it on. Thing 2 is quite slender and only seems to grow in one direction...UP.  She is still able to wear clothes that she got when she was 4, but, of course, length is an issue.

Tb4

I decided to tackle a project that I've wanted to try for a while now...lengthen a T-shirt. So, here is how ~I~ did it. I'm no expert and I'm sure there might be easier and/or better ways to accomplish this, but here is what I did...


nblab_howididit 


  1. Find another T-shirt to cut up and use for the extra length. I chose an adult T already on-hand (I'm trying to accomplish this project quickly and for zero cost ;)
    T1
  2. Use the small T as a guide for how wide to cut the pieces from the larger T.
    T2
    I laid the small T on top of the large T (both inside out) and cut.
  3. Next, I opted to serge the two long upper edges cut from the large T because they were starting to ravel a tiny bit. This might not be necessary on 100% cotton T material, but the large T was a stretchy poly blend, so serging the edges made it look nicer on the inside.
     T3
  4. Then, with RIGHT sides together, serge both side seams. I stressed ~RIGHT sides together~ for my own benefit because I messed up the first go around and serged right to wrong side and had to rip it out and do it again ;0 T4
  5. Turn both small T and new lengthening band right side out and pin the band to the bottom of the small T. Since the band is stripey, I found it easiest to pin this way and use one of the stripes as a guide on where to pin. I made sure the upper serged edge of the stripey band was slightly above the stitching on the hem of the small T since I would use the old hem stitch as a guide for the new hem stitch.
    T6
  6. Next, stitch the band to the small T. I would have chosen hot pink thread to match the original hem stitch, but I didn't have that on-hand and, as I mentioned before, I was attempting to do this project as quickly as possible and for no cost. So, I chose black thread and used a straight stretch stitch to attach the band. I sewed on the outside of the T, stitching through both the small T and the new band.
    T7
  7. As expected, this method created a bit of a puckering effect when it was completed. I steam ironed the hem and it looked much better.
    T8
  8. Done! Quick and easy and free ;)
    Tafter
    Again, I would have chosen thread to match the small T so the new hem wouldn't be so noticeable, but she's happy and she can wear her shirt for at least another season. I could cover the stitching with some cute trim or add a ruffle and I might add some more of the striped fabric and make the sleeves a bit longer because I think that would look cute, but that's for another day. Right now, I just need to get her to brush her hair and find some pants that match and we'll be ready to head out to the birthday party!

So, of course, I couldn't leave it well enough alone...

Thursday, May 14, 2009

A different perspective...

nblab_rambleThis morning while cleaning off the kitchen table after the family has departed for their various work and school locations, I found this note penned by Thing 2 yesterday afternoon...

T2note

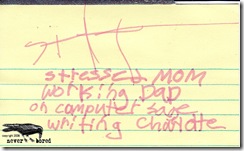
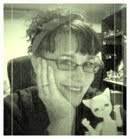
...a little glimpse into the life of an 8-year-old on a Wednesday afternoon.

I guess I have been stressed lately (probably a lot longer than just lately, but it seems to be more evident lately)....feeling pulled in about a million different directions at any time and not being able to get much actually accomplished...excuse me, I have to run upstairs and reprimand and retrieve the doxie who is in the yard barking non-stop at passerbys...I'm back, but that took longer than expected as I reached the yard and remembered that I promised Mr. NeverBored that I would...excuse me again, I have to run upstairs and yell at the giant lab puppy who is cleaning my kitchen counter right now...NOT forget to water the "crops". He planted grass, spinach and pumpkins last weekend...have I mentioned that I have BROWN thumbs?!? As I return to my desk, I remember that I have e-mails to send, bills to pay, web sites to update, packages to mail, projects to start and finish...all before the kids get home from school and that starts a whole different set of things I must do...etc.etc.etc.

I need a week or two off, but doubt that will happen any time soon. School is almost out for the summer. I used to love summer vacation. Vacation? What's that? I don't even recall the meaning of that word anymore. The last ~real~ vacation I had? A trip where there was just fun and a break from reality? That would have to be a trip to New York (won from E-online) with my BFF in December of 2004. That was almost 5 years ago. There have been a couple other trips since then, but none were just for fun...a move from the East Coast to here, a trip to visit family that was ill, a weekend camping trip to Estes Park with Thing 2's Brownie Troop (OK, that was fun, but being responsible for a cabin full of screaming Brownies is hardly relaxing ;) and...and...well, that's about it.

SandTNY2005

...stressed mom...yeah...I need to change that. I think one of my next projects will be a VISION BOARD with a VACATION prominently featured. But, first, I have to make a ~pretty~ Vision Board that will look nice in my newly redecorated studio ;)


nblab_mustread


In the interest of reducing stress and bringing more positive things into my life, I recently swapped to receive the book THE SECRET...


Swapped, you ask? Yes! I discovered SWAPTREE.COM a few months ago and have already completed a few trades and love it! The basic idea is to list books you have that you are willing to trade and then add books you would like to trade for and then wait for (or initiate offers). You each pay the postage to get the book to the other, but that's the only expense involved. If you would like to join (and give me a little credit for free postage ;), shoot me an e-mail (either you know me and my e-mail OR there is a link on the first page of this blog, in the column down the left side,  that looks like a vintage postcard) and I will send you an e-mail invite. After you join, you can invite friends and get free postage, too!


nblab_mustsee


There is also a DVD, that I have watched:

Some of it is kinda hokey, but there are some good (common sense) ideas presented. Basically, think positive thoughts and good things will happen to you. Easier said than done, right? ;P

Sorry for all the whining...I will try to get back to more fun stuff soon.

Monday, May 11, 2009

Never Bored Collectibles & Curiosities

nblab_shoppeI recently rented a booth at a local Antique Mall and have been working on filling my few small shelves with interesting stuff for sale. I would like to rent a larger space soon so that I can add some furniture and bigger items, but wanted to test things out first without making a huge financial commitment.

I have plans to decorate my little space so that it is more visible, but am still working on ideas for that. I did decide on a theme (the same as my blog) to get the ball rolling on this and then created a Welcome Sign to identify my space....

NBWelcomeSign

Sunday, May 10, 2009

I know I am loved...

nblab_rambleMother's Day. The one day a year that Mom gets a break from being...a...mom. The one day that you tell Mom...all day long...how much you love her.

As I try to sleep in this morning and drown out the sounds of early morning disagreements while breakfast is being made...I know I am loved.

As I finally get tired of waiting in bed and decide to make my way to the kitchen for a cup of coffee and am greeted with sullen looks and pouty faces...I know I am loved.

As Thing 2 quickly forgets the morning squabbles and runs over to me and throws her arms around my waist and says "I wanted to be the first one to hug and kiss you today!"...I know I am loved.

As Mr. NeverBored serves up the yummy disagreement-causing Banana Bread French Toast...I know I am loved.

As I am presented with a fragile little plant in a festive pot that has been lovingly tended to in Mrs. D's 2nd Grade Classroom that I and my 2 Brown Thumbs are expected to nurture and keep alive...I know I am loved.

CharPlantMD2009

As I open the package containing my favorite once plain and simple much-used apron that has been ~creatively~ and lovingly decorated by Thing 1 with ribbons, pom-poms , wiggly eyeballs and a lot of hot glue and I hear myself vow to "wear it often"...I know I am loved.

SageApronMD2009

As I leave as much of the housework undone as long as I can possibly stand before diving in...I know I am loved.

As I listen to my girls argue about everything and nothing just like any other day...I know I am loved.

As I make lunch and dinner, and feed the dogs, and do the dishes...just like any other day...I know I am loved.

As I prepare to take the dogs for a walk and hear "I'll go with you Mom!" as I politely decline and say "That's OK. I need a some fresh air and a little quiet time to myself." and then I get a big, wet "kiss" across the face from the puppy...I know I am loved.

As I look over the lovely drawings made especially for me on this Mother's Day 2009...I know I am loved.

MD2009Cards

SageMD2009Card

As I sit here and type and think about my Mom and try to remember all those Mother's Days from years gone by and hope that we made her feel loved and special and wish that I could be where she is to do something nice for her on this day to let her know how much I appreciate all she has done for me [ AND to possibly try and make up for all those other Mother's Days when I was a kid ;) ]...I know I am loved.

Happy Mother's Day, Mom...I love you :)

Friday, May 8, 2009

Bento Laptop Lunch for Kids

nblab_goodpurchase I have been trying to get more creative with the girls' lunches. I have also been trying to come up with ways to be more environmentally conscious and change some of our bad habits. Switching to mostly WASTE-FREE lunches seemed like a step in the right direction. I came across LAPTOP LUNCHES while surfing the web one day and decided to order a couple for the kiddos. We've been using them for a few weeks now and really like them. I love that I don't have to buy and dispose of about a million little plastic baggies any more, not to mention all the waste from individual packaging for milks, juices, fruits, snacks, etc. It is usually cheaper to buy in bulk anyway, so this is also a money-saving decision, too. Additionally, I am finding that I am getting more creative with the girls' lunches and that they are more willing to try new things for lunch when presented nicely in their cute LAPTOP LUNCHES.

Here is Thing 2 with her Bento style lunch for today:

CharLaptopLunch

Cold mac 'n cheese, apple slices, Sun chips, peanut butter and apple "sushi", Clif fruit snack and a Mix Berry Mix 1...mmmm....(yes, I realize there is going to be some waste after this lunch is eaten, but only one small wrapper from the Clif snack...the Mix 1 bottle will be recycled ;)

Lunch050809

Thing 2 turned up her cute little nose and said "eeeeewwwwww" when I told her she was going to have sushi in her lunch, but then she quickly realized it wasn't real sushi as she watched me make the little rolls. She thought it was a great idea and couldn't wait to try them! I found the "sushi" recipe at On a Whimm... Click here for the easy tutorial... 

nblab_musttry If you aren't familiar with MIX 1 protein & antioxidant drinks, you should be. We discovered Mix 1 because a good friend of ours is one of the founders of the company, but we recommend Mix 1 because it is delicious and healthy and you should run right out and get some...now. It is available at Whole Foods and King Soopers in our area, but it can also be ordered on-line at Amazon.com. So there, you have no excuse not to try it...no matter where you are ;) I have linked to my favorite Mix 1 flavor, Lime, but you can easily find the other flavors from links on that web page...

We LOVE our Teachers!

nblab_giveitThis past week has been TEACHER APPRECIATION WEEK. Thing 2 adores all her teachers and wanted to make something nice for them. I found a few fun ideas and we finally decided on bottles of hand sanitizer (which weren't all that easy to find due to the Swine Flu Panic) featuring a special picture that Thing 2 drew for each of the 3 teachers she wanted to give a gift to.  This project was inspired by Giver's Log.

CharTeacherGifts

This was an easy project that turned out very nice...

1) Choose some hand soaps or sanitizers that are clear. Giver's Log said sanitizer did not work for her, but we haven't had any problems yet. We put these together yesterday and this morning the images were still intact and looked great...I hope they stay that way :0) I also chose bottles with clear sticker front labels and back labels that were opaque inside the bottle.

2) Remove the front labels and any remaining sticky residue. I left the back labels showing the ingredients and the opaque back of the back label (the part that shows inside the bottle) helps the transparent drawings show up better once they are inside the bottles. I had to resort to some GOO GONE for that large bottle. The smaller bottles in front are GERM-X and the labels came right off with no remaining sticky gunk.

3) Have the artist create some special drawings.

CharTeacherDrawings

I opted to leave any misspellings because I think it's cute and from the heart ;)

4) Scan the drawings, resize and clean up as needed, add a border, and print. I use PhotoShop for all my graphic work. I chose to keep everything black since I wasn't sure how color ink would hold up when submerged in sanitizer.

5) Take the print to a copy shop (I used Office Depot) and ask for the print to be copied onto a transparency sheet.

6) Trim transparencies, roll into a slender tube shape that will fit into the neck of the bottle and slip in. The transparency should unroll itself nicely into place, but you may need to help it a little with the stem of the plunger top.

7) Replace plunger, tie a pretty bow around the neck and VIOLA!

8) Send your creations off to school with adorable child (who likes to dress herself ;) ....

CharGifts050809

Wednesday, May 6, 2009

Teapot Pansies

nblab_funfinds I found a couple antique metal teapots the other day while on my thrift store rounds. I was thinking about offering them for sale in my antique mall booth, but then had a vision of them filled with beautiful little pansies. So, now they are filled with pansies and perking up my back porch....

teapotpansies

When I was a little girl, tulips were my favorite flowers. Over the years, pansies have moved to the top of list. I love their little flower "faces" and can't help feeling a bit more cheerful each time I look at them.

Pansies.

O give me not red roses,
That early dews have wet!
They speak to me of kisses
That are remembered yet.
O bring me not white roses,
That summer winds have drest!
For once I placed white roses
Upon a quiet breast.
But bring me purple pansies
If so you wish to please,
For them I have affection;
For pansies are "heart's ease".

__Louisa Cooke Don-Carlos.

Dear Things And Queer Things
Louisa Cooke Don-Carlos
(Lawrence: The World Company. 1934)

Friday, May 1, 2009

Studio Re-Do

nblab_contprojectI have been calling my ~space~ an office way too much in this blog. It's much more than that...it's my sanctuary. It's slowly becoming the space I want to be in rather than just the space I have to be in to do that 4-letter word thing...work. I need a better name for it, but, for now, it will be my ~Studio~.

The other day, I shared the photo of my new and improved work space under the window....

newworkspace 

I realized it was kind of ugly underneath, not to mention all that wasted space. I decided to hang some curtains across the front and add some small shelves underneath.

DeskCurtains

The curtains also go over the shelves on the right, but I lifted them to show the shelves underneath. I want some prettier curtains, but these will do until I find just the right pair.

Another recent improvement to the ~Studio~  was to add some metal sheeting (I LOVE metal and will take any chance I can get to play with it, work with it, incorporate it into my surroundings). I have been a bit reluctant to jump in and buy a big sheet of metal because I was worried about cutting it down to size for the projects I had in mind. I was driving by Home Depot a couple days ago and popped in to price giant sheets of metal. The price was right, so I grabbed one huge sheet and figured I would just jump in (i.e. ask my neighbor for help) and cut it. Luckily, my neighbor was outside as I arrived home and then pulled the giant metal sheet from the car.  He came right over with a pair of mega metal scissors that cut this stuff like BUTAH! My first project was finished in about 10 minutes.

Here is my desk before with all that blank white space behind the computer:

office2

I wanted metal back there so that I could make cute magnets and put photos and stuff in all that space.

Here is a photo of the metal in place:

DeskMetal

And here are my adorable new vintage button magnets!

ButtonMagnets

I have had some of these buttons for years. I never found just the right project for them. I thought it was time for them to be enjoyed, so I heated up the glue gun and attached a tiny magnet to the back of each. Viola! Instant awesome magnets for my new metal desk background!

I still had quite a bit of metal left and my next desire was a place to take photos of my dolls. I had been using the top of a tall black bookcase and a couple metal things to hold pretty papers for backgrounds. The metal things (I think they used to be some kind of cabinet doors) were just propped up and kinda ugly and always falling over. I decided to cut a piece of metal to fit the top part of the bookcase and then adhered it with some strong double stick tape. Perfect! Now, I can easily switch the background papers and not have everything topple over several times during the photo shoot...

PhotoSpace